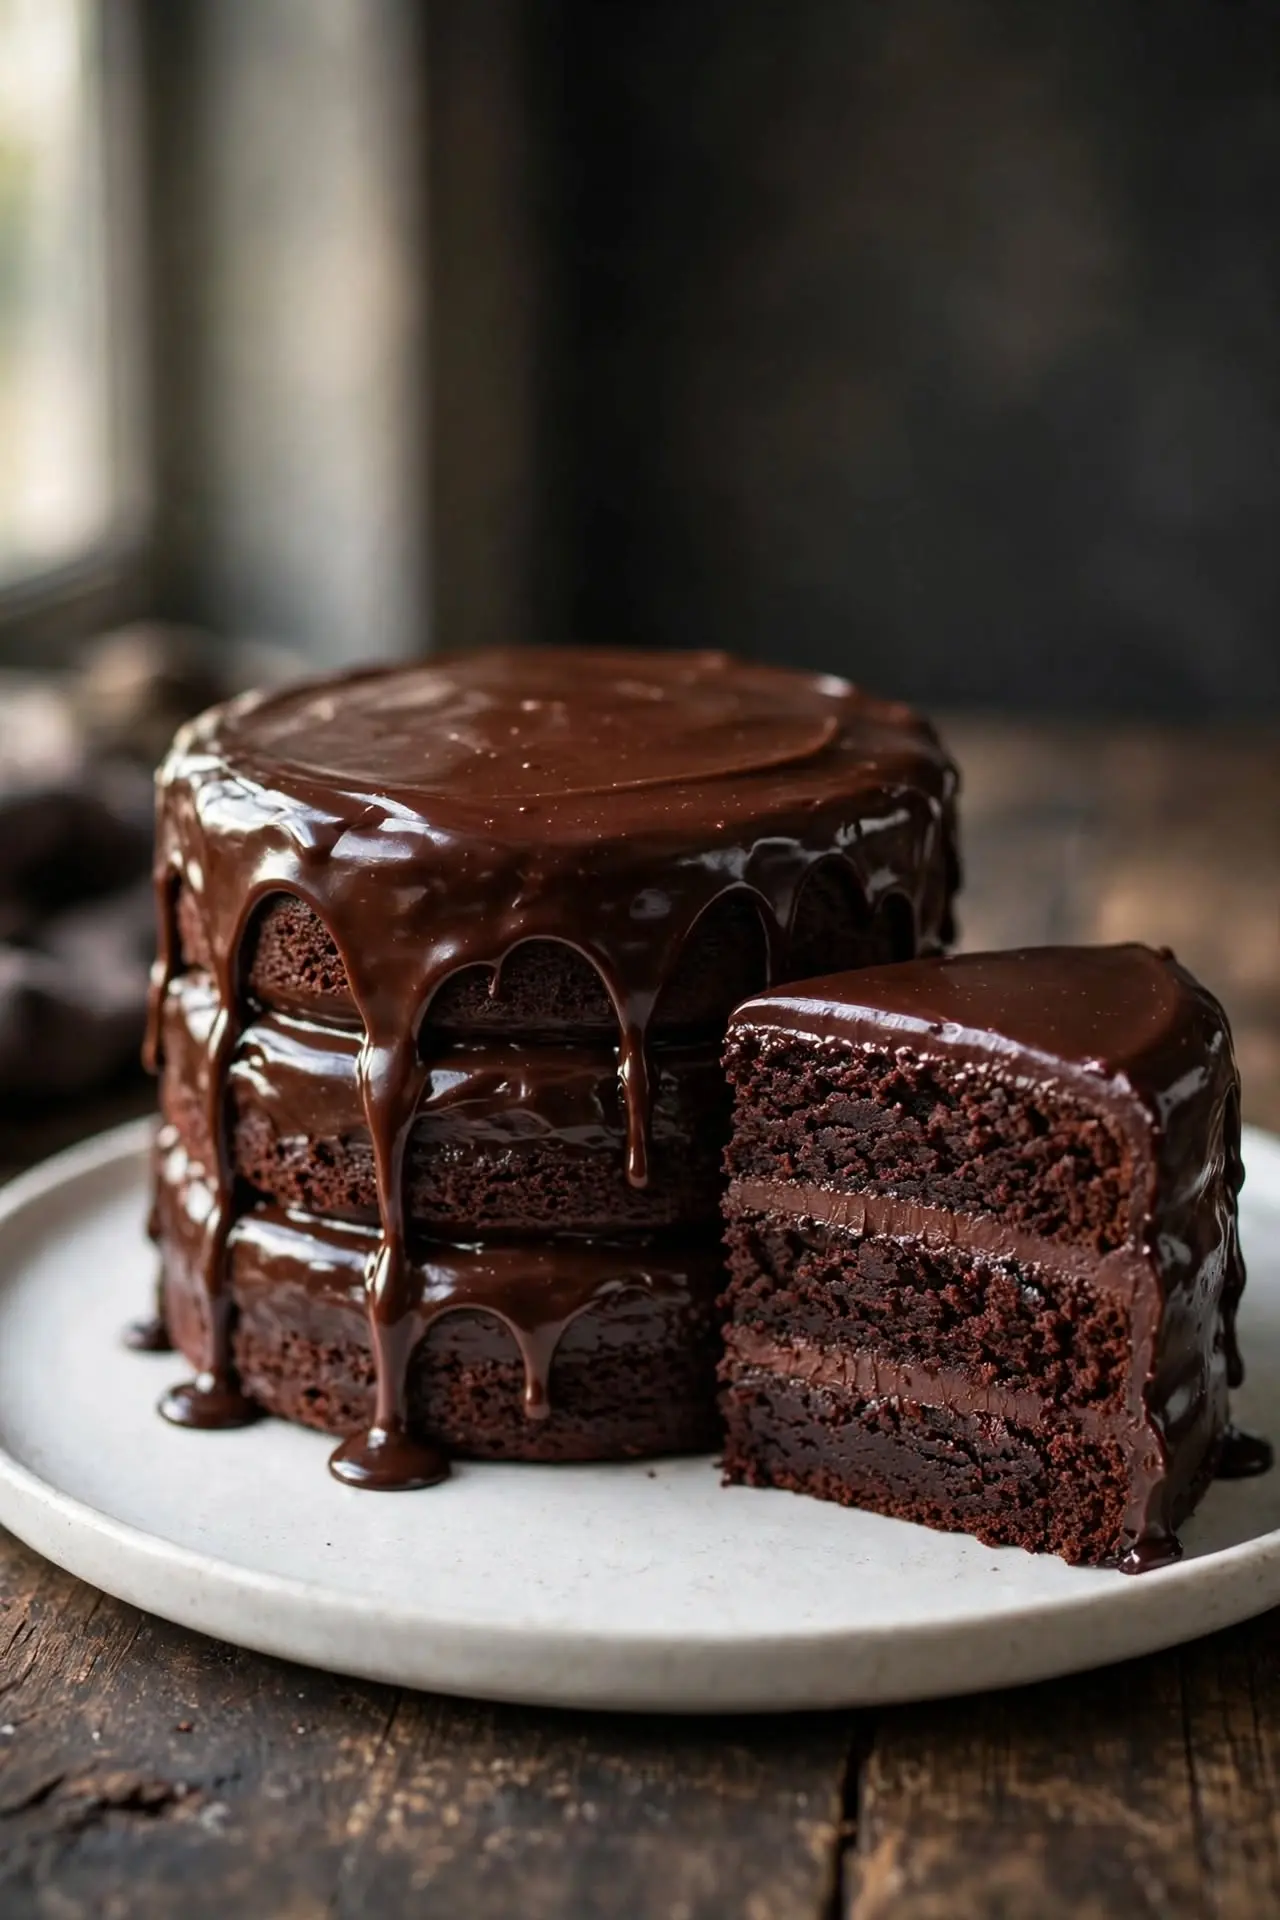
The Best Chocolate Cake You Will Ever Make (Moist, Fudgy, and Foolproof)
There is a version of chocolate cake that stays with you. Not the dry, crumbly kind that needs a glass of milk just to get it down, but the kind so moist and fudgy you want a second slice before you have finished the first. This chocolate cake is exactly that.
I tested this recipe nine times over two months before it was right. The first few rounds were too dense. One batch rose unevenly. One version had a slightly gritty texture because the sugar and cocoa did not combine properly. What you are reading now is the version that made my sister put down her fork and say, “What did you do differently this time?”
What makes this one work is a combination of Dutch-process cocoa powder, buttermilk for that soft tight crumb, and hot coffee poured into the batter at the end. The coffee deepens the chocolate flavor without making the cake taste anything like coffee. You do not need a stand mixer. You need one bowl, a whisk, and about 45 minutes.
Recipe at a Glance
| Prep Time: 20 minutes | Cook Time: 35 minutes | Total Time: 55 minutes |
|---|---|---|
| Servings: 12 | Difficulty: Easy | Calories per Serving: approx. 380 |
Why You Will Love This Recipe
- Ready in under one hour from mixing bowl to table
- One bowl for the entire batter, which means almost no cleanup
- Uses ingredients that are likely already in your pantry right now
- Tastes even better on day two once the crumb has settled
- My daughter asked for this three days in a row after the first time I made it. That said everything.
- Works perfectly with a smooth ganache or just a dusting of powdered sugar if you want to keep it simple
Nutrition Information
| Calories per Serving | Protein | Carbs | Fat |
|---|---|---|---|
| approx. 380 | 5g | 52g | 18g |
| Fiber | Sugar | Sodium |
|---|---|---|
| 3g | 32g | 290mg |
Serving Size: 1 slice (based on 12 equal slices)
Servings per Recipe: 12
The fat content here comes from butter and eggs, which are exactly what produce the fudgy texture and richness. Dutch-process cocoa contributes a small but real amount of fiber alongside the deep color and smooth flavor. If you want to reduce the sugar slightly, cutting up to 20g works without affecting texture. Going further than that dries out the crumb noticeably.
Nutrition values are approximate and calculated per serving using standard ingredient amounts. Values may vary based on brands used and portion sizes.
Ingredients
For the Cake:
- 1 and 3/4 cups (220g) all-purpose flour
- 3/4 cup (75g) Dutch-process cocoa powder (I use Valrhona or Rodelle for the deepest color and smoothest flavor)
- 2 cups (400g) granulated white sugar
- 1 and 1/2 teaspoons baking powder
- 1 and 1/2 teaspoons baking soda
- 1 teaspoon fine sea salt
- 2 large eggs, at room temperature
- 1 cup (240ml) full-fat buttermilk (substitute: 1 cup whole milk plus 1 tablespoon white vinegar, left to sit 5 minutes)
- 1/2 cup (120ml) neutral oil such as sunflower or vegetable oil
- 2 teaspoons pure vanilla extract
- 1 cup (240ml) hot brewed coffee (substitute: 1 cup hot water with 1 teaspoon instant coffee dissolved in it)
For the Chocolate Ganache:
- 1 cup (240ml) heavy cream
- 250g good-quality dark chocolate at 70%, finely chopped (I use Lindt 70% or Callebaut, both halal-certified)
- 2 tablespoons unsalted butter, at room temperature
- Pinch of fine sea salt
Equipment Needed
- Two 9-inch round cake pans: Line the bases with parchment circles and grease the parchment. If yours are dark-coated, reduce the oven temperature by 25 degrees F since dark pans absorb heat faster.
- Large mixing bowl: You need enough depth to whisk without sending batter over the sides.
- Kitchen scale: Weight measurements are far more reliable than cups for flour and cocoa. One packed cup of flour can add 25 to 30% more than intended.
- Whisk and rubber spatula: The whisk combines everything efficiently. The spatula gets every last bit out of the bowl.
- Wire cooling rack: The layers must cool completely before frosting or the ganache melts on contact and slides off.
- Offset spatula: Makes spreading the ganache smooth and controlled without dragging crumbs into the surface.
Preparation
Set yourself up completely before touching the bowl.
- Pull the eggs and buttermilk out of the refrigerator at least 30 minutes before you start. Room temperature ingredients combine more evenly and give you a smoother batter.
- Brew the coffee and let it cool slightly. It should be hot but not boiling when it goes into the batter.
- Grease both pans, line the bases with parchment, and grease the parchment too.
- Preheat the oven to 350 degrees F (175 degrees C).
- Measure every ingredient before you touch the bowl. The batter comes together in minutes and you do not want to be hunting for the baking soda mid-mix.
- Chop the dark chocolate for the ganache and set it in a heatproof bowl. You can do this while the cakes bake.
Step-by-Step Instructions
Step 1: Whisk the dry ingredients
Combine the flour, cocoa powder, sugar, baking powder, baking soda, and salt in a large bowl. Whisk for a solid 30 seconds until everything is evenly combined with no cocoa clumps visible at the bottom.
Chef’s Note: Cocoa powder, especially Dutch-process, clumps aggressively. If you sift nothing else in this recipe, sift the cocoa before adding it. A single undissolved clump in the finished cake leaves a dry bitter pocket in that slice.
Step 2: Add the wet ingredients
Make a well in the center of the dry mix. Add the eggs, buttermilk, oil, and vanilla extract directly into the well. Whisk from the center outward until you have a thick, smooth batter with no dry streaks remaining at the bottom.
Step 3: Pour in the hot coffee
Slowly pour the hot coffee into the batter while whisking gently. The batter will thin out considerably and look almost pourable. This is exactly right.
Chef’s Note: The batter will look too thin at this point and it is natural to second-guess yourself. Do not add more flour. This thin consistency is precisely what produces the moist, dense crumb in the finished cake. Trust the recipe and move on.
Step 4: Bake
Pour the batter evenly between both prepared pans. Tap each pan firmly on the counter two or three times to release large air bubbles. Bake at 350 degrees F (175 degrees C) for 33 to 37 minutes, until a toothpick inserted into the center comes out with a few moist crumbs attached but no wet batter.
Chef’s Note: Start checking at 33 minutes. Overbaking by even five minutes makes the crumb dry, and no amount of ganache fixes that later. Moist crumbs on the toothpick mean the cake is still finishing from residual heat in the pan, which is exactly where you want it.
Step 5: Cool completely
Leave the pans on a wire rack for 15 minutes, then run an offset spatula around the inside edges and turn the cakes out gently. Peel off the parchment and let both layers cool completely before frosting, at least 45 minutes.
Step 6: Make the ganache
Heat the heavy cream in a small saucepan over medium heat until it just starts to simmer at the edges. Pour it over the chopped chocolate in your heatproof bowl. Wait 2 minutes without touching it, then whisk from the center outward until completely smooth. Add the butter and salt and whisk again until glossy. Let the ganache rest at room temperature for 20 to 30 minutes, stirring occasionally, until it thickens to a spreadable consistency.
Step 7: Assemble and frost
Place one cooled cake layer flat-side up on a serving plate or cake board. Spread a generous layer of ganache across the top. Place the second layer on top, flat-side down. Pour the remaining ganache over the top and use an offset spatula to spread it outward and over the sides. Leave it textured for a rustic finish or smooth it for a cleaner look.
Expert Tips and Tricks
- The single biggest difference in early testing was using natural cocoa versus Dutch-process. Natural cocoa has a sharper, more acidic flavor. Dutch-process is smoother, darker, and far less acidic, which gives this cake its deep color and mellow richness. They are not interchangeable here.
- Make the ganache while the cakes are baking. By the time both layers have cooled, it will have thickened to exactly the right spreading consistency.
- If the ganache firms up too much before you finish, set the bowl over a pot of warm water for one to two minutes and stir gently. It comes back immediately.
- The cake layers can be baked a day ahead, wrapped tightly in plastic wrap, and stored at room temperature. They actually frost more cleanly once slightly settled.
- For neat slices at the table, chill the frosted cake for 20 minutes first and wipe the knife clean between cuts.
[CALLOUT BOX: Baking this for a birthday or event? Bake the layers up to three days ahead, wrap them tightly in plastic wrap and foil, and freeze them. Thaw at room temperature the night before and frost the day of serving. The texture is just as good, sometimes better, and it takes all the last-minute pressure off.]
Common Mistakes to Avoid
Using cold eggs and buttermilk. Cold dairy does not emulsify smoothly with the fats and dry ingredients. The batter looks slightly curdled, the gluten develops unevenly, and the finished crumb is noticeably tighter than it should be. Thirty minutes on the counter before you start is all it takes.
Opening the oven before 30 minutes. I did this on my third test batch out of impatience and the center sank completely. The structure of the cake is fragile during the first half of baking. The oven door stays closed until the 33-minute mark.
Overmixing after adding the wet ingredients. Once the flour is hydrated, gluten develops. The more you mix, the tougher and denser the crumb gets. Whisk just until no dry streaks remain and stop. Thirty seconds is usually enough.
Frosting a warm cake. If any heat remains in the layers, the ganache melts instantly and runs straight off the sides. Feel the center of each layer with the back of your hand before you start. If it still feels warm at all, wait longer.
Skipping the salt in the batter. Salt is not just a background note in chocolate cake. It is what makes the chocolate taste like chocolate rather than flat sweet brown. Every time I tested a version without it, the flavor was noticeably one-dimensional. It is not optional.
Storage Instructions
Room Temperature: Covered with a cake dome or wrapped in plastic wrap, this chocolate cake keeps well for up to 3 days at room temperature in a cool dry spot. Avoid refrigerating unless your kitchen runs warm.
Refrigerator: Store in an airtight container for up to 6 days. Bring it back to room temperature before serving, about 30 to 45 minutes on the counter. Cold ganache becomes dense and loses its glossy finish straight from the fridge.
Freezer: Wrap individual slices first in plastic wrap, then in foil. Freeze for up to 3 months. Thaw overnight in the refrigerator or for 1 to 2 hours at room temperature.
Reheating: For a warm single slice, microwave for 15 to 20 seconds at 50% power. The ganache softens nicely without getting runny.
[FOOD SAFETY NOTE: When reheating, make sure the inside of the slice is fully warmed through, not just the surface. Uneven microwave heating can leave the center cold while the outside feels hot. Never reheat the same portion more than once.]
[FOOD SAFETY NOTE: The ganache contains heavy cream. Do not leave frosted cake sitting at room temperature for more than 2 hours in warm weather above 90 degrees F (32 degrees C), as the cream can spoil quickly in heat.]
I always slice the whole cake before storing it. Individual portions are far easier to wrap properly, they freeze without the ganache getting crushed, and you can grab exactly one slice without disturbing the rest.
Make-Ahead Notes: Baked layers can be made up to 2 days ahead and kept at room temperature, wrapped well. The ganache can be made up to 3 days ahead, stored in a sealed jar in the refrigerator, and warmed gently over a pot of hot water until spreadable again.
Variations and Substitutions
Spicy Mexican Chocolate: Add 1 teaspoon of ground cinnamon and 1/4 teaspoon of cayenne pepper to the dry ingredients before mixing. The heat builds slowly at the back of each bite and makes the whole cake more interesting. Frost with ganache as usual.
Kid-Friendly Mild Version: Replace the coffee with an equal amount of hot water. The chocolate flavor is lighter and less intense, which works better for younger eaters. A plain chocolate buttercream made with butter and icing sugar is an easier, sweeter frosting for this version.
Gluten-Free Version: Swap the all-purpose flour with a 1:1 gluten-free baking flour blend. Bob’s Red Mill 1:1 Baking Flour works particularly well here. The texture is slightly denser but still very moist. Avoid blends that list xanthan gum twice in the ingredient list.
Sheet Cake Version: Pour the entire batter into a greased 9×13-inch pan and bake at 350 degrees F (175 degrees C) for 40 to 45 minutes. Spread the ganache directly over the cooled surface. Faster, easier, and feeds a crowd.
Vegetarian: This recipe is already fully vegetarian. No changes needed.
What to Serve With This
Vanilla ice cream: One scoop of cold vanilla ice cream next to a warm slice of chocolate cake is a combination that has survived for good reason. The contrast of temperatures and flavors makes both better. [INTERNAL LINK: homemade vanilla ice cream recipe]
Fresh raspberries or strawberries: The sharpness of fresh berries cuts through the richness of the ganache and adds color. Pile them over the top just before serving or set them out on the side.
Lightly sweetened whipped cream: Heavy cream whipped with a teaspoon of vanilla and a small amount of icing sugar is simpler than ice cream and gives the richness somewhere to breathe.
Cold milk or mint tea: A glass of cold full-fat milk or a pot of sweet mint tea is the halal pairing that genuinely works here. Both balance the intensity of the chocolate without competing with it.
Full dessert spread: For a birthday or gathering, pair the cake with a plate of fresh fruit and a small dish of dates or mixed nuts. The freshness keeps the table from feeling too heavy.
[CALLOUT BOX: For the cleanest ganache finish possible, pour all of it over the top of the cake at once and let gravity pull it naturally down the sides. Then make one smooth pass around the edges with your offset spatula. The less you touch the surface, the better it looks.]
Frequently Asked Questions
Can I make chocolate cake without buttermilk?
Yes. The simplest substitute is 1 cup of whole milk with 1 tablespoon of white vinegar stirred in. Let it sit for 5 minutes until it curdles slightly, then use it exactly as you would buttermilk. The acidity reacts with the baking soda the same way, so the texture stays consistent. I have used both versions in this recipe and the difference is barely noticeable. Full-fat plain yogurt thinned slightly with milk is another option that works well and is what I reach for when I am out of both.
Why does my chocolate cake always come out dry?
Almost always overbaking. Chocolate cake looks underdone at 30 minutes and the instinct is to leave it longer, but the carryover heat in the pan keeps cooking it after it comes out. Pull it the moment the toothpick shows moist crumbs rather than wet batter. The second most common cause is measuring flour by scooping directly from the bag, which compacts it and adds 20 to 30% more flour than intended. Spoon flour into the measuring cup and level it off, or weigh it.
Can I use cocoa powder instead of melted chocolate?
For this specific recipe, the whole formula is already built around cocoa powder, so there is nothing to substitute. If you are adapting a different recipe that calls for melted bar chocolate, the general rule is 3 tablespoons of cocoa powder plus 1 tablespoon of neutral oil for every 30g of chocolate called for. The texture and flavor are slightly different but it works well in layer cakes like this one.
How far ahead can I make chocolate cake?
The baked layers hold well for 2 days at room temperature wrapped tightly in plastic wrap. The fully assembled and frosted cake is best within 3 days, though it is still genuinely good on day four. For longer lead time, freeze the unfrosted layers wrapped in plastic and foil for up to 3 months. Thaw at room temperature and frost the day you plan to serve.
Why does my chocolate cake sink in the middle every time?
The most common cause is opening the oven door too early. The structure of the cake is fragile during the first 25 to 30 minutes and cold air rushing in collapses the center before it has set. Another cause is slightly too much leavening. Too much baking soda or baking powder creates rapid rising followed by collapse. Measure both with a level spoon rather than scooping. Overmixing the batter is a third reason: it traps air unevenly and the structure cannot support it.
Conclusion
This chocolate cake has become the one I make for every occasion that matters. Birthdays, Friday nights when someone needs cheering up, last-minute gatherings where I want something that looks impressive without requiring serious skill. It fits all of them.
The difference really does come down to the Dutch-process cocoa and the hot coffee. Together they pull a depth of flavor out of a simple pantry recipe that has no business being that good. Make it once and you will understand why this one stayed.
If you loved this chocolate cake recipe, save it to your chocolate desserts Pinterest board so you can find it easily later!